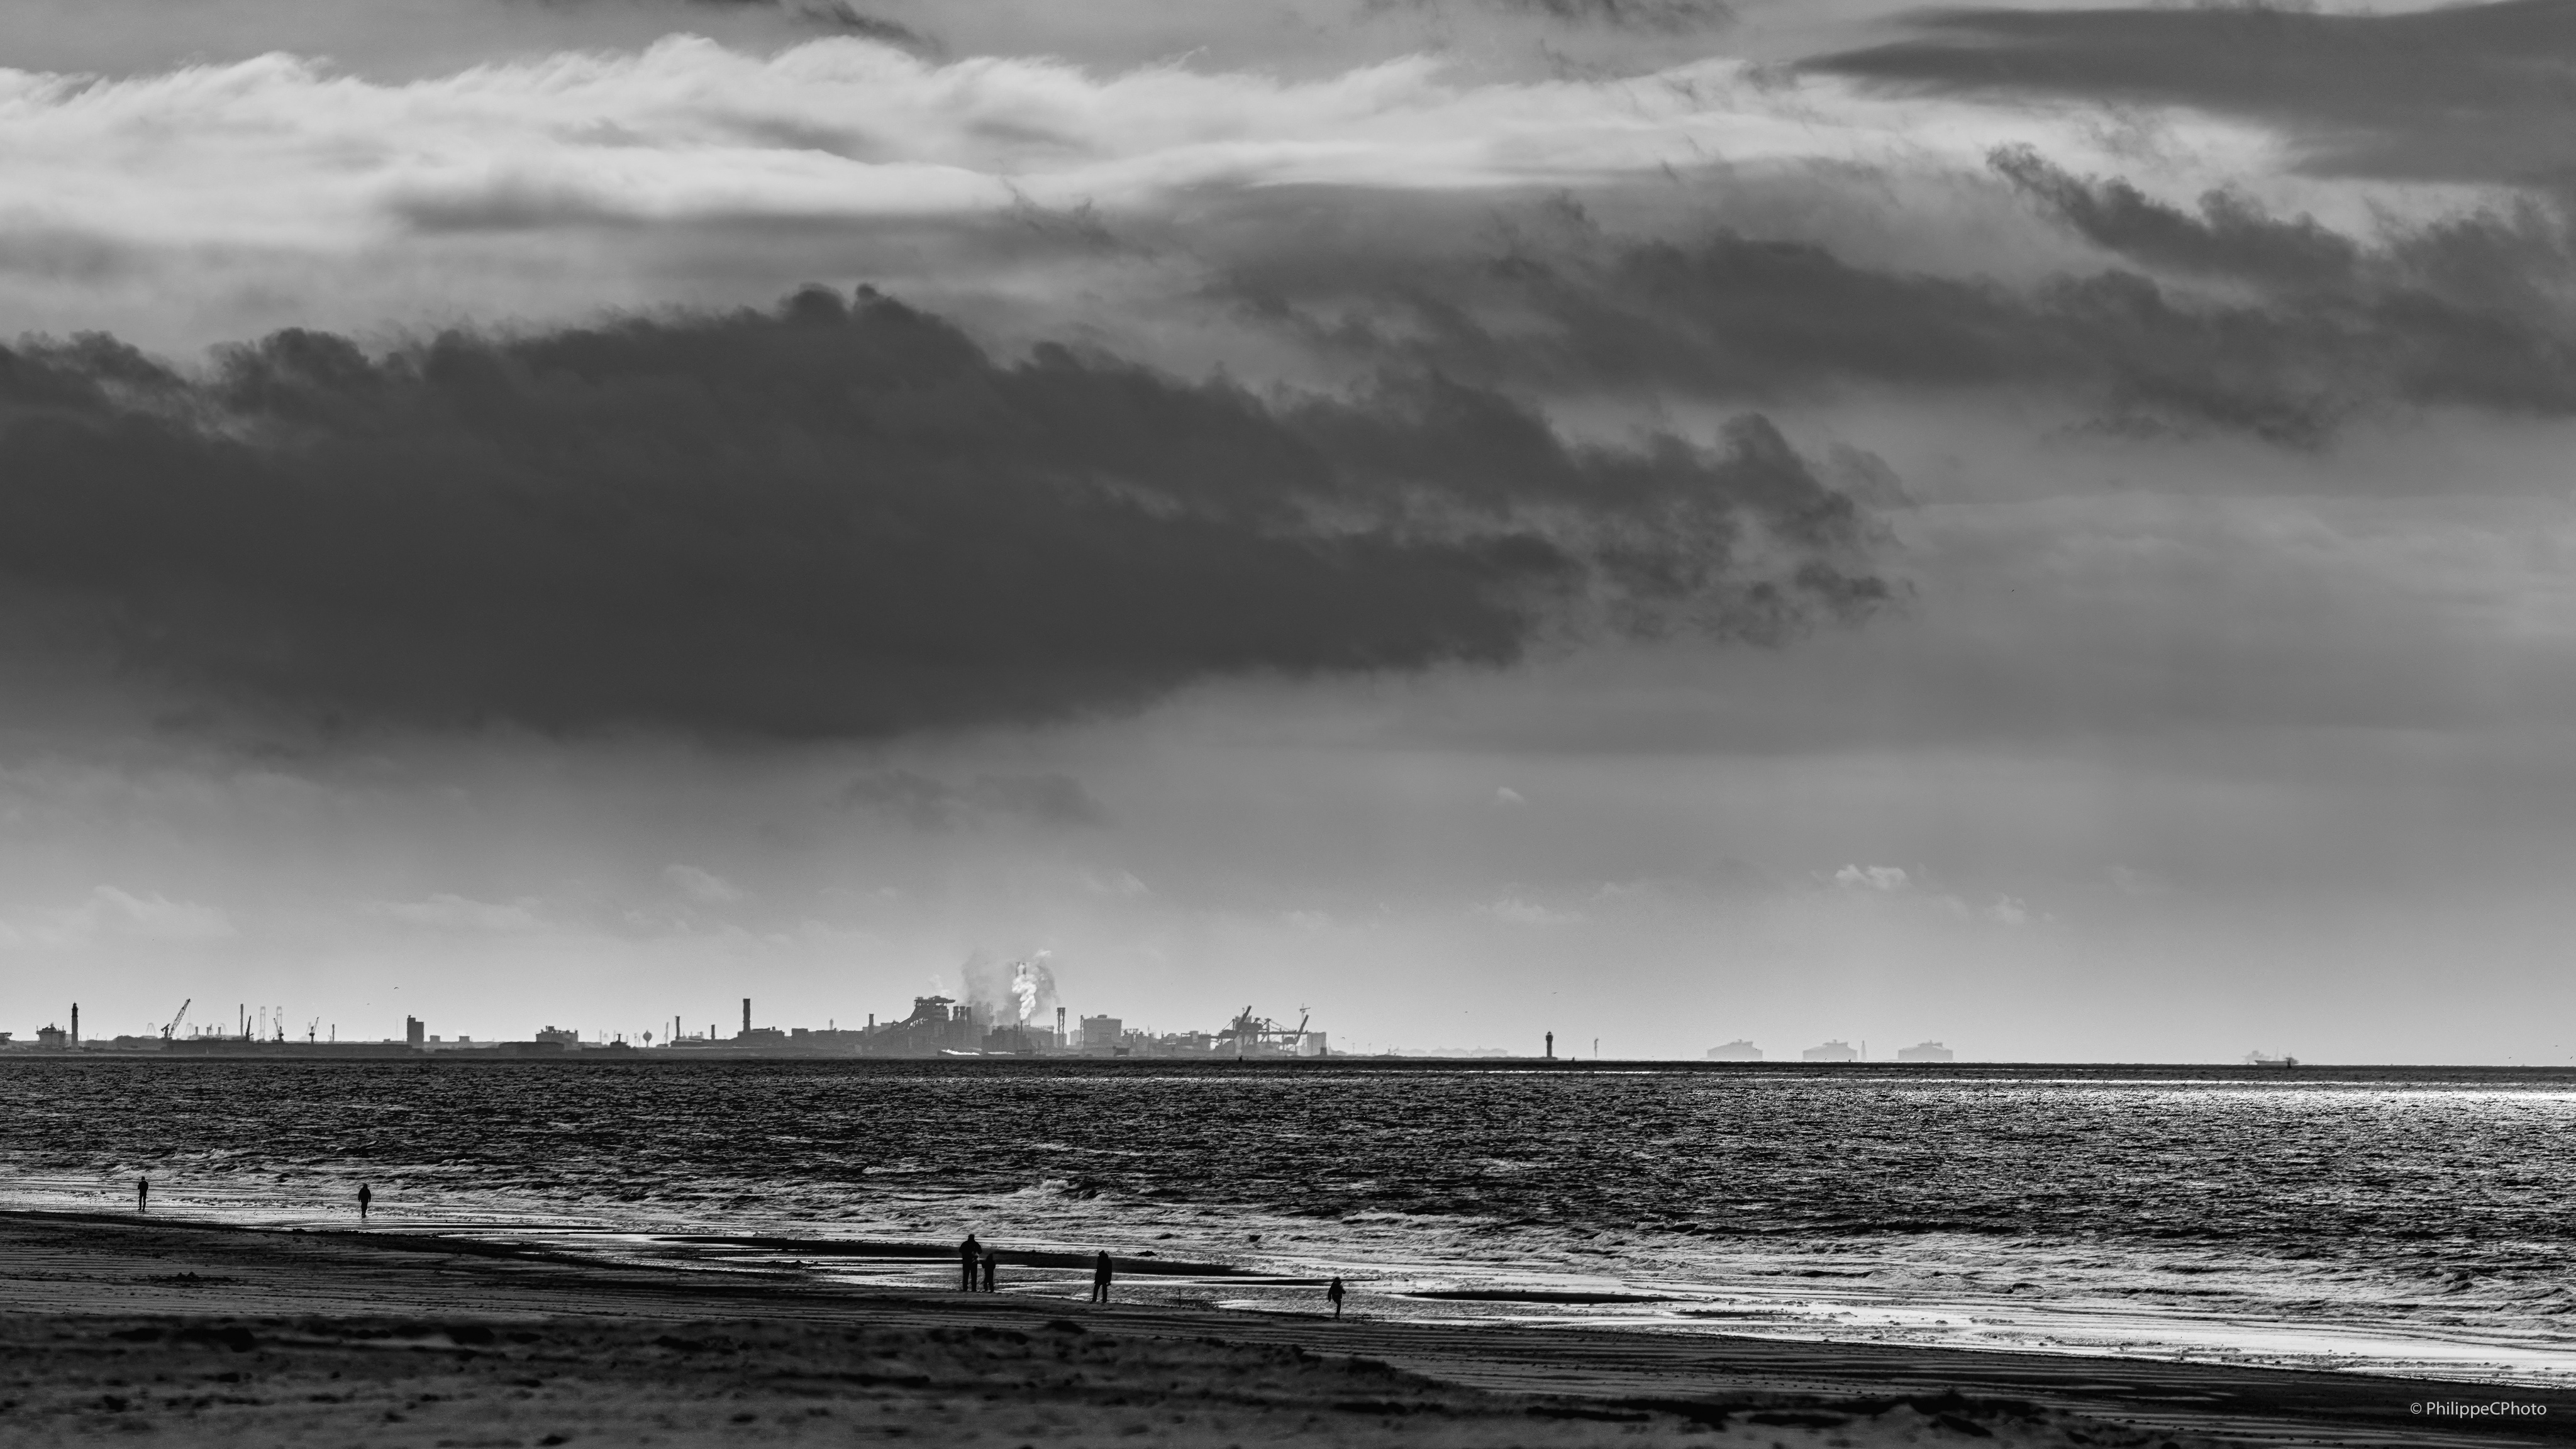
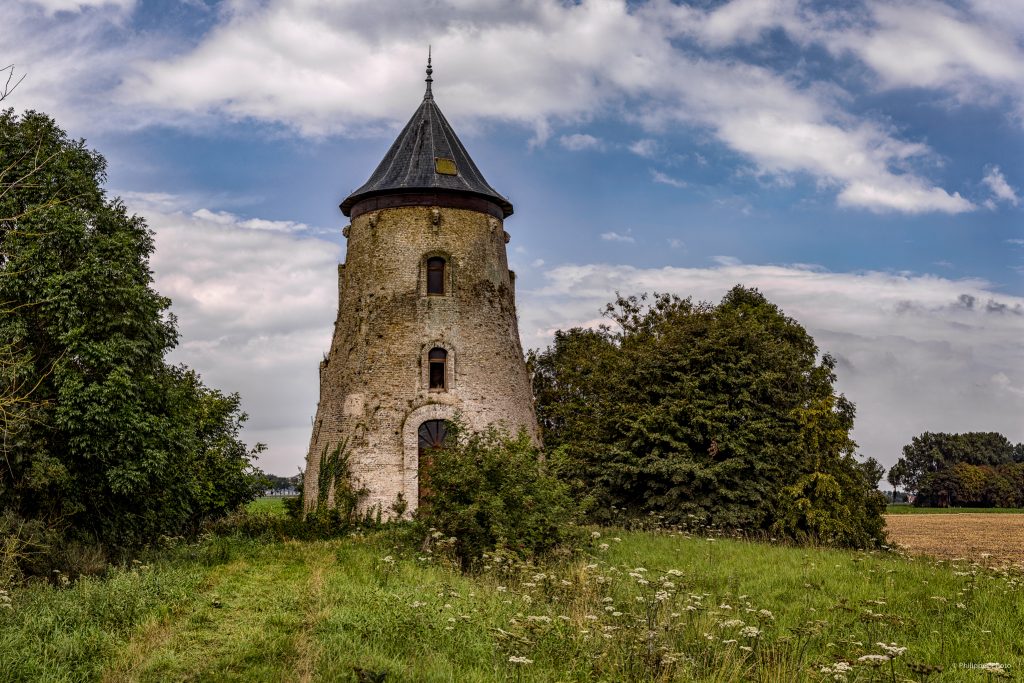
Les photos ont été prises depuis Coxyde avec un 400mm sur un Canon R6 MKII 24 MPX. Ensuite assemblées et la photo résultante passée en haute résolution (4x image de base c-à-d 180 Mpix) en Lightroom. Le fichier DNG (RAW) pèse 1,1 GB sur disque.
Les industries sont à environ 25km du point de prise de vue et les stockages de gaz à 30km.
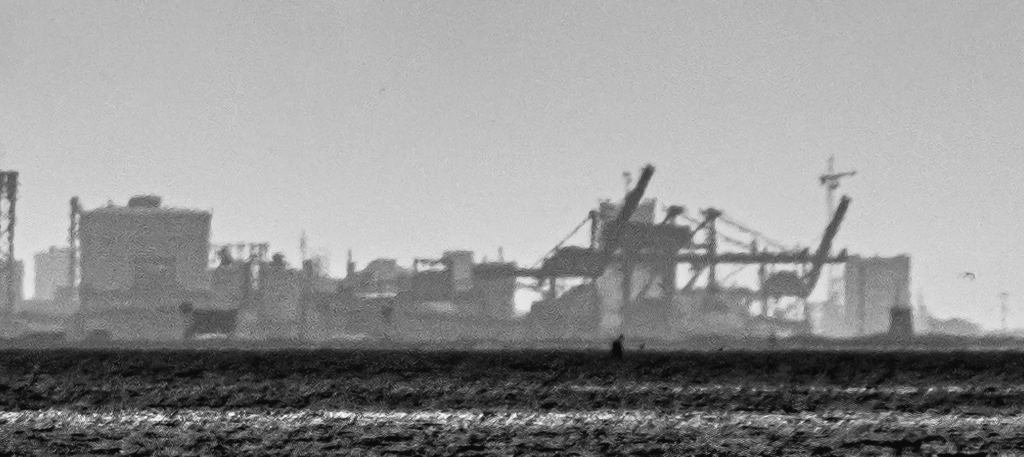
Crop 100% des industries à 25 km
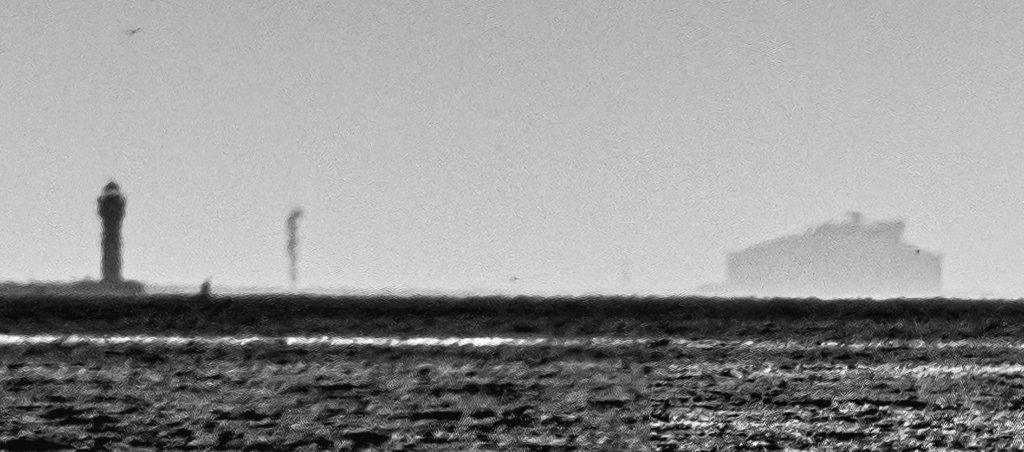
Crop 100% des stockages gaz à 30 km
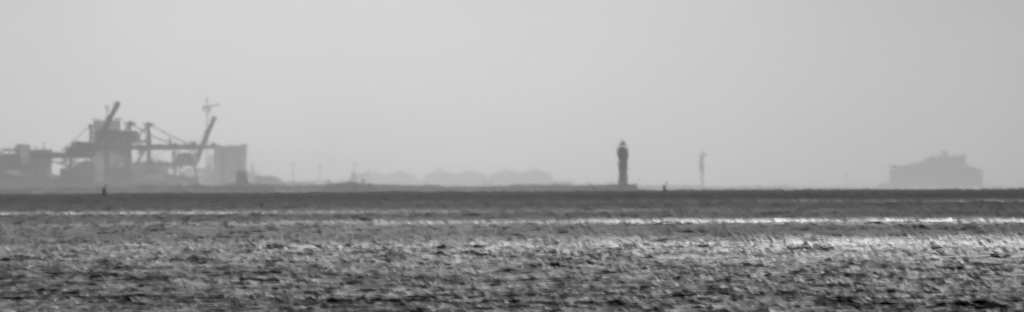
La même scène à partir d’une seule image en crop à 100%
Cameras are equipped with advanced autofocus systems that are often hard to understand. Knowing how to use the autofocus system effectively is essential to get sharp images. A badly-focused, blurry image can ruin a photograph and you cannot fix it in post-processing.
You must keep in mind the fact that autofocus functionality depends on what camera type and model you are using. So you need to learn how your camera’s autofocus is working and practice to master it.
This article is based on “Autofocus Modes Explained” by Nasim Mansurov (photographylife Oct 2020) https://t.ly/4W7d
Manual Focus
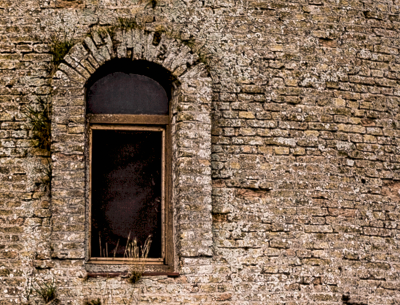
You can of course disengage the autofocus system and make the focus using your hand and your eye, sometimes helped by peaking systems. In some situations that will be the only way to get a sharp image, for instance sometimes when there’s a window between you and your subject.
How is Autofocus Working ?
For autofocus systems to function properly, they need an area of high contrast. If you use your camera to focus on a white wall with no texture, or a blue sky without any clouds, your autofocus system will try to focus a few times and eventually give up.
That also means that AF needs light to properly work. If not enough light is reaching the sensor the AF will rapidly struggle to get the focus right, therefore the added value of lenses with a high opening (low F).
Phase Detection AF vs Contrast Detection AF
Phase Detection AF uses a dedicated hardware (an array of microlenses). As light passes through these microlenses, it splits up into a pair of images. The distance between these images is then measured to see how far front or back-focused the subject is.
Contrast Detection AFrelies on software algorithms that “probe” through areas of an image for edge detail.
Some sensors (e.g. Canon DUAL AF) are integrating the microlenses removing the need to have a specific sensor for AF.
DSLR vs Mirrorless Autofocus Systems
In a DSLR (mirro down), a part of the light reaches the AF sensor through the semi-translucent mirror.
In live view (mirror up) the DSLR and the Hybrid cameras are working exactly the same way : The AF is done thanks to the light reaching the main sensor.
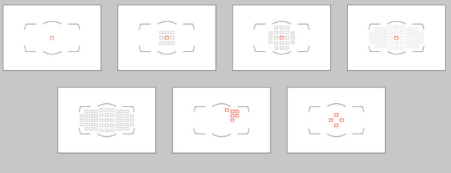
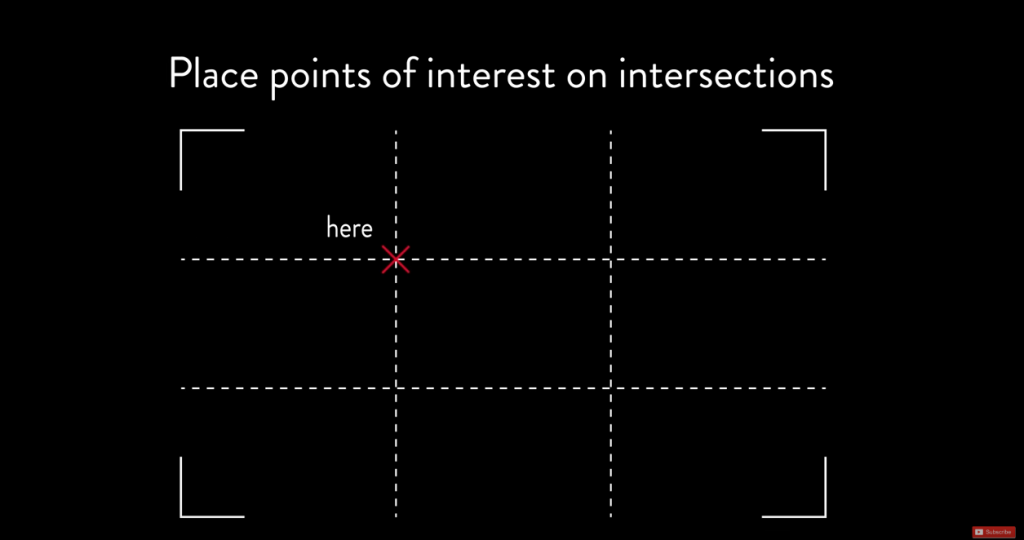
Focus Points and AF-Area Modes
Cameras allows photographers to choose which focus points, the little squares in the viewfinder, will be used by the autofocus system. That can be a single one, e.g. for focusing on an eye in a portrait, a block of them or even all of them.
Autofocus Modes
Single AF (AF-S) / Single Area AF / One-Shot AF Mode
The “Single AF” mode (AF-S) will snap into focus once, and if your subject moves, it won’t reacquire focus even if you continue half-pressing the button. Hence, the focus remains “locked”.
Continuous AF (AF-C) / AI Servo Mode
The AF-C mode will automatically re-adjust focus if you or your subject move. All you need to do is continue half-pressing the shutter button and the autofocus system will automatically track movement and adjust focus.
AF Auto (AF-A) / AI Focus AF Mode
Some cameras also have a mode called “AF Auto” (AF-A) which is basically a hybrid mode that automatically switches between AF-S and AF-C modes. If the camera thinks that the subject is stationary, it switches to AF-S, and if the subject moves, it will automatically switch to AF-C mode.
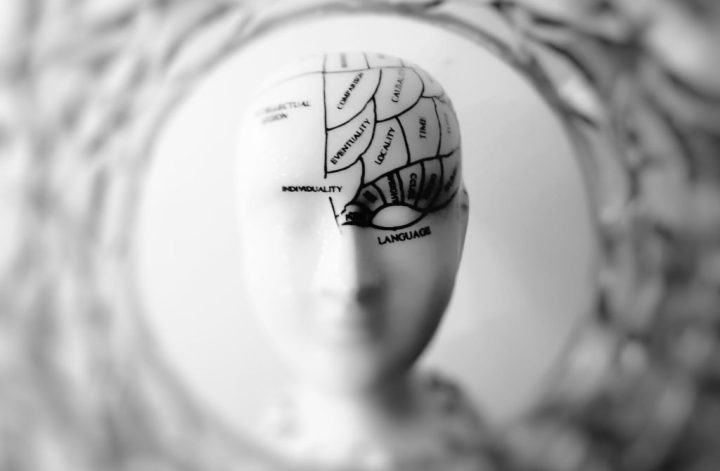
Face / Eye / Subject Detection
As our cameras are becoming more and more powerful from a computing point of view, new autofocus modes are appearing. For instance, some cameras are now able to detect a face or even eye in a scene and focus on this element. These capabilities are relying on so-called Artificial Intelligence (AI) / Deep Learning (DP).
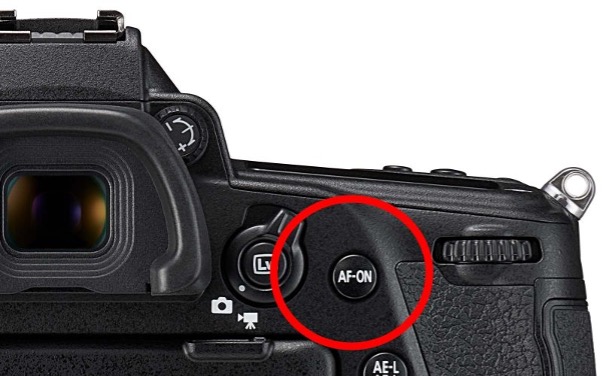
Back-Button Focus VS Shutter Focus: Which One is Right For You?!
Often referred as “back-button AF,” this feature lets the user customize the camera so that focusing is performed by pressing a rear button. The shutter button still wakes up the camera with a half-press, and fires the shutter with a full press downward.
By separating AF activation from shutter release, it’s possible in some cases to be more effective with AF, and not have the focus thrown off if something momentarily enters the picture area while you’re shooting.
Advantages of using back-button focus are : Easier to lock focus, Easier timing of shots, Less risk of focus error with moving subjects, Easier over-riding of AF with full-time Manual focus and Easier macro and close-up focusing.
I’m always using it for years. In fact, that’s the first default setting I’m changing when using a new camera.
My suggestion : Give it a try for a few photo sessions and then decide what’s best for you.
During the April’s meeting I’ve also presented a TTT (Ten Minutes Technical Tip) about Dynamic Range and Contrast, a companion subject. Click the button below to open the presentation.
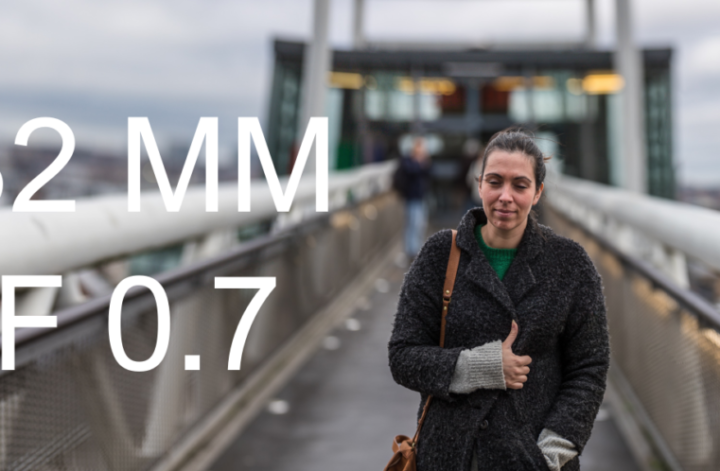
La méthode Brenizer permet de dépasser les limites de votre objectif et de votre capteur pour créer une image ayant une profondeur de champ extrêmement courte rappelant les images effectuées avec un appareil moyen/grand format.
J’ai déjà publié deux articles consacrés à la méthode Brenizer en 2016.
En décembre 2018 j’ai eu le plaisir de présenter cette méthode lors d’une réunion de mon club photo Viewfinders.
Il vous suffit de cliquer l’image ci-dessous pour parcourir la présentation faite ce jour là. En espérant que la méthode vous inspire et que vous fassiez quelques essais de celle-ci. N’hésitez à publier ceux-ci en réaction à cet article sur ma page Facebook.
This is a very interesting method to overcome the physical limitations of your lens and create images (especially portraits), with an incredible shallow depth of field. This technique, made popular by Ryan Brenizer, is based on a panoramic image stitching (in Photoshop and other image processing software) where several images of the subject and around the subject are digitally merged together to create a large file with a wideangle of view.
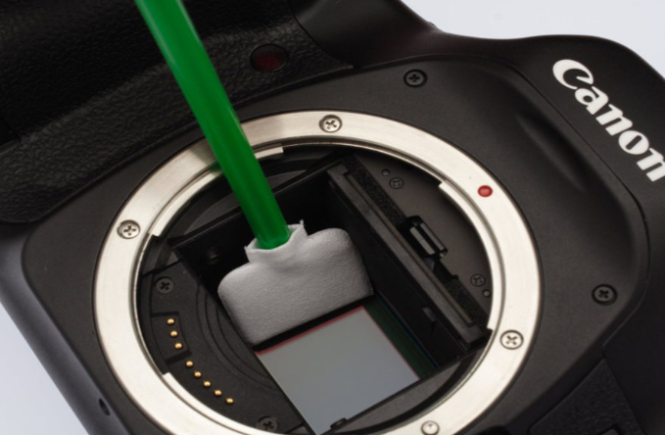
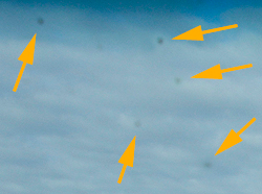
From time to time,
more often than you will, you will get small spots on your images, especially
in flat areas of colour such as a sky or a plain wall. They will be much more
visible on pictures taken with a small aperture (F8 and above).
They will certainly ruin your picture and even more on a huge and expensive print.
L’idée est de créer une atmosphère proche des blockbusters produits par Hollywood en poussant les tonds chauds sur une partie de l’image (dans les hautes lumières principalement) et les tonds froids dans le reste de l’image (principalement dans les basses lumières).
Le but de cette article est de vous présenter quelques essais effectués pour comparer les résultats obtenus (image finale) en utilisant ou pas une fusion HDR.
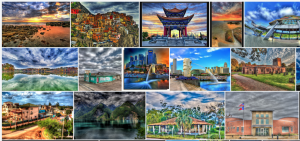
J’utilise parfois la fusion HDR pour dépasser la dynamique du capteur tout en essayant de fuir le rendu très artificiel, et à mon sens horrible, des HDR poussants les curseurs à fond comme les exemples ci-dessous. .
Mon objectif est de parvenir à garder des détails dans les hautes comme dans les basses lumières en dépassant, lorsque nécessaire, les limites du capteur, sachant que j’ai un boitier Canon légèrement moins performant que les capteurs Sony (Boitiers Sony, Nikon, …) en dynamique.
A noter que le boitier m’indiquait un écrêtement à droite (hautes lumières) et qu’il surestime systématiquement les sous/sur expositions dans son histogramme.
Je pense que cela provient du fait que le JPG utilisé pour visualiser la photo sur l’écran du boitier est également utilisé pour calculer l’histogramme.
Pas certain …
Les photos sont prises en full RAW et convertie en DNG lorsque je les importe en Lightroom (LR).
Images de base
Trois images prises à main levée avec un bracketting -2,0,+2 :
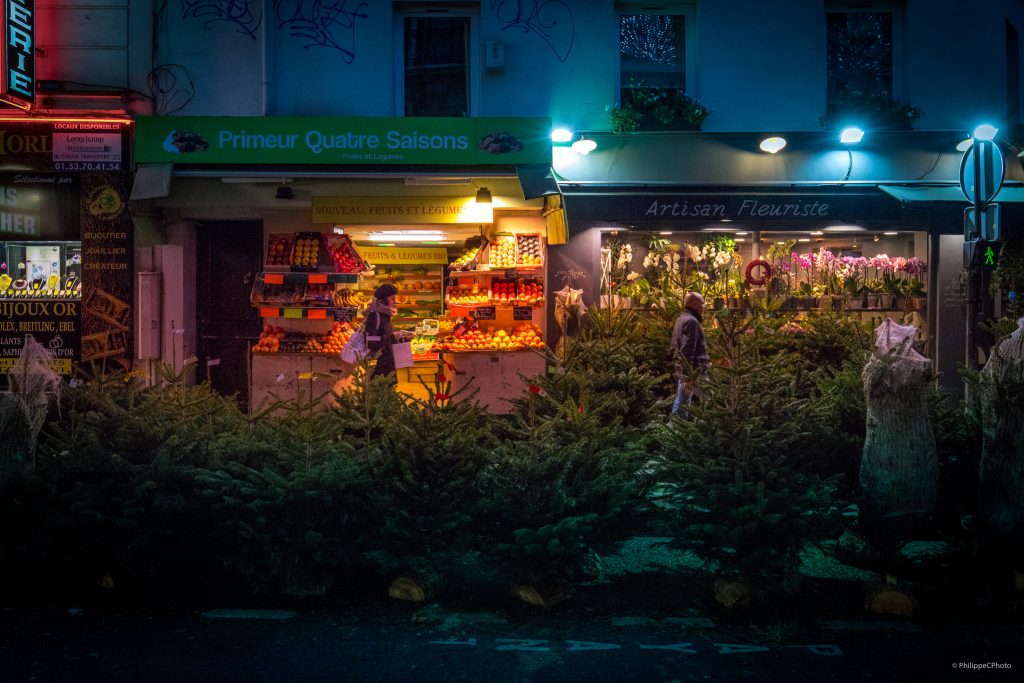
Image originale correctement exposée (non HDR)
Image correctement exposée :
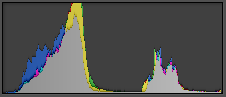
L’histogramme à une forte pointe à droite provenant du ciel très blanc mais (quasi) pas d’écrêtage.
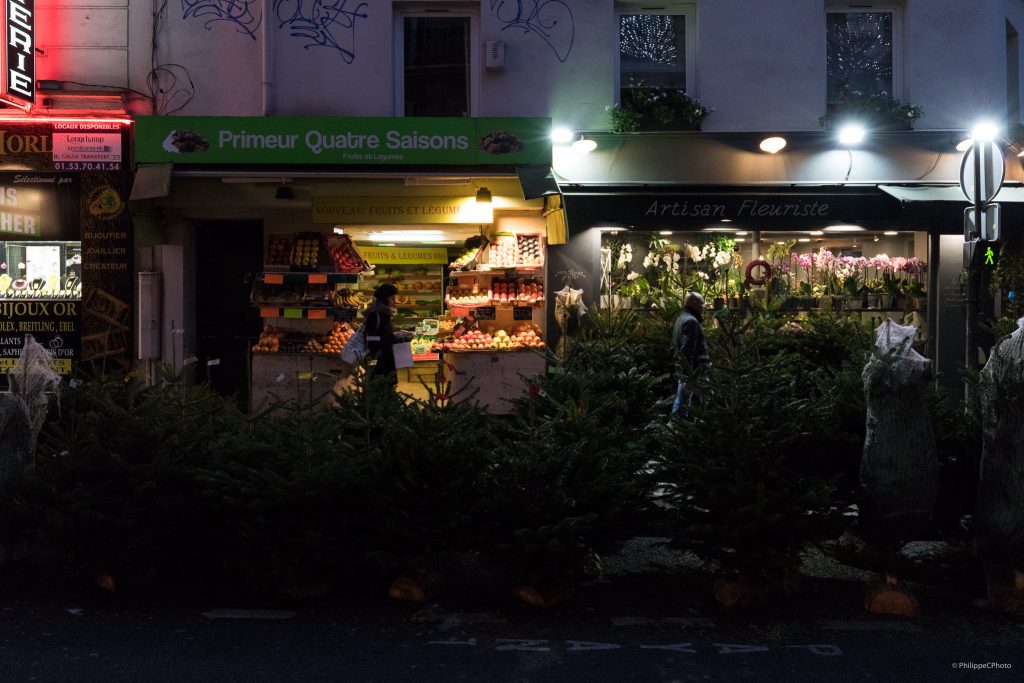
En développant la photo original correctement exposée en LR j’obtiens l’image suivante :
A droite l’image originale traitée en LR et à gauche l’image originale sans traitement :
Fusion HDR PRO Photoshop (PS)
Image résultante de la fusion HDR des 3 images faite en Photoshop sans modifier les réglages par défaut proposés par PS :
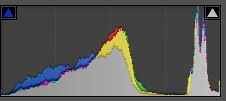
L’histogramme donne une distribution en deux bosses sans noirs ni blancs francs.
Une correction auto en Lightroom redistribue la luminosité en équilibrant l’image et en profitant de la gamme dynamique enregistrée dans le HDR :
En partant de l’image HDR fournie par PS et en développant la photo en LR j’obtiens l’image suivante :
A droite l’image originale traitée en LR et à gauche le HDR PS traité en LR :
Fusion HDR Lightroom (LR) avec Auto Tone
Image résultante de la fusion HDR des 3 images faite en Lightroom en activant l’option « Auto Tone » :
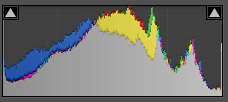
C’est dans cette configuration que l’histogramme est le plus cohérent avec une bonne répartition :
En partant de l’image HDR fournie par LR avec Auto Tone et en développant la photo en LR j’obtiens l’image suivante :
A droite l’image originale traitée en LR et à gauche le HDR LR Auto Tone traité en LR :
Fusion HDR Lightroom sans Auto Tone
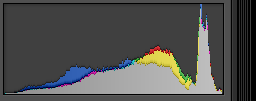
Image résultante de la fusion HDR des 3 images faite en Lightroom en désactivant l’option « Auto Tone » :
Appliquer le réglage « Auto » en LR a postierori donne quasi le même rendu qu’en activant « Auto Tone » en créant le HDR, ce qui en soit n’est pas une surprise …
:
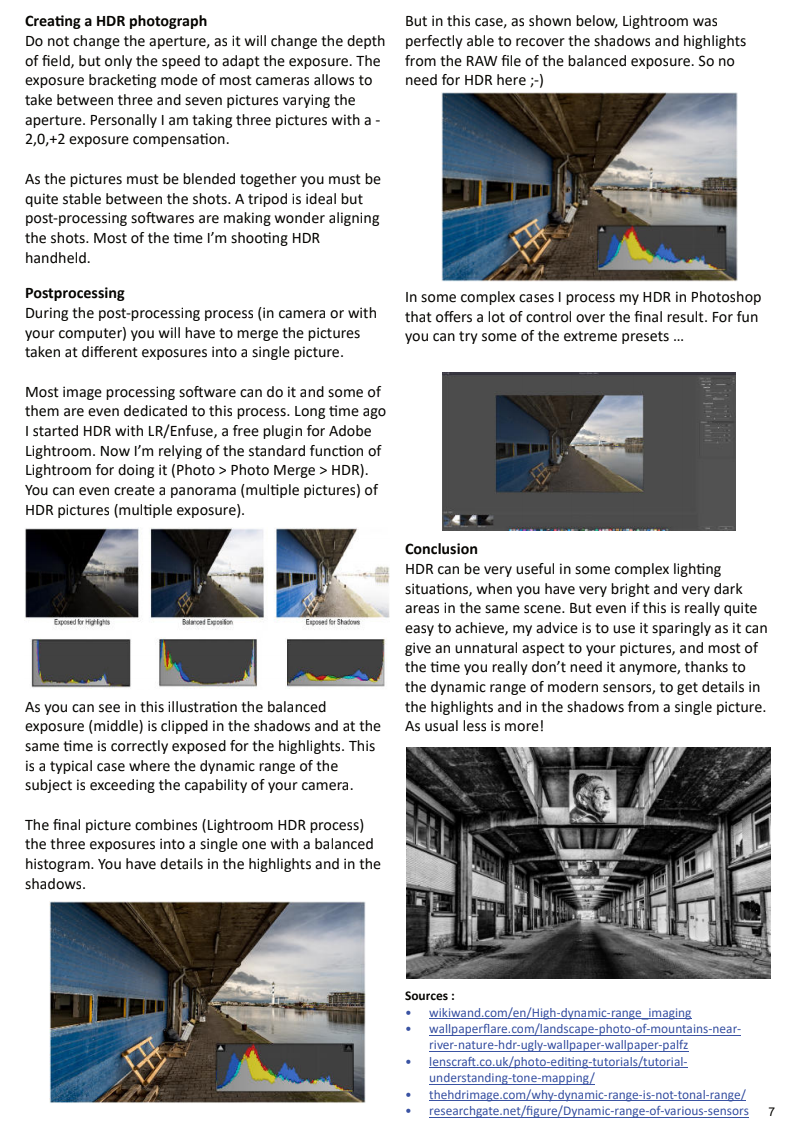
Conclusion
Même si le boitier m’indiquait un écrêtage des hautes lumières et malgré le contraste plutôt fort de la scène, entre le ciel très lumineux et la façade des bâtiments à l’ombre, un boitier de 4 ans (Canon 6D) est souvent capable d’enregistrer suffisamment de dynamique en RAW pour pouvoir obtenir une image correctement exposée après quelques traitements en Lightroom (filtre gradué, dehaze, …). Seuls des cas extrêmes (contrastes très violents) nécessitent de faire appel au HDR.
Photo de 60 Mpx réalisée avec le Canon 6D de 20 Mpx. IL s’agit d’un assemblage réalisé en Lightroom (Photo > Photomerge > Panorama) d’une dizaine de photos balayant le sujet comme pour la méthode Brenizer.