Catégorie : Blog

  • 3 Reasons Why You Should Switch To Back Button Focus

    Article très intéressant de James Brandon sur Digital Photography Schoolexpliquant les avantages de ne plus utiliser la pression à mi-course sur le déclencheur pour faire la mise au point mais bien le bouton dédié AF-ON se trouvant sous le pouce à l’arrière du boitier.

    Over the past couple of years (and really since writing my ebook) I’ve become a huge advocate for making the switch to back button focus. It was one of the most revolutionary changes I ever made to how I take pictures. It seems like such a small thing, yet it’s such a huge difference in the way your camera works. I honestly don’t know why this isn’t the standard setting on all cameras because after getting acclimated to this setting, I honestly can’t understand the meaning for or use of the ‘shutter half way down’ method.

    No More Switching Your Lens To Manual Focus

    This little advantage takes some getting used to, mainly because for the first few weeks after switching to BBF you’ll likely keep switching your lens to manual focus out of habit. When your focus is set to your shutter button, you have to switch your lens to manual focus so your camera doesn’t refocus when you go to take the picture. Otherwise, you’d set your focus manually, then you’d press the shutter half way down and the camera would override what you manually set. How annoying! When you switch to BBF you no longer need the focus mode selector on your lens because the camera will no longer refocus when you press the shutter down. In most cases, your AF-ON button will be used for focus and focus only. So you’re free to use your shutter button as just that, a shutter!

    No More Refocusing Every Time You Let Go of the Shutter

    This was one of the most frustrating things I ran into when I used the ‘shutter half way down’ method of focusing. Sure you can lock in focus by holding the shutter half way down, then focus will stay locked as long as you hold your shutter in limbo. But then you have to hold your finger there! If you really think about it, doesn’t that sound absurd? If you let go or accidently lift your finger just a little bit, the camera will refocus as soon as you press it down again. Or press the shutter a little too hard and you will take a picture before you’re ready.

    With BBF, you can set focus and it will stay set until you decide to change it. For wedding photographers, that means that you can be at the end of the aisle while the bride and groom are giving their vows. You aren’t moving and neither are they. You can use the center AF point and focus on the brides face with your telephoto lens and then you’re set for as long as you’re in that position. With the old method, you’d have to refocus on the bride or grooms face with each shot. That’s how you end up with throw away shots where you accidently focused on the ministers face instead of the bride or groom. And let’s just hope you don’t have to hand over a set of photos of the kiss with a blury bride and groom and a sweaty, tack sharp minister.

    Use Servo for Almost All of Your Focusing Needs

    The two main types of auto focus on your camera are (on a Canon) One-Shot and AI-Servo. On a Nikon they are called AF-Single (AF-S) and AF-Continuous (AF-C). One-Shot means that when you press your AF-ON button (or the shutter half way down) your camera will set focus one time based on where the subject is at the given time. If your subject moves or if you move, you have to reset your focus. This method wouldn’t work very well if you were photographing your kids running around the sprinkler in the summer, or photographing a football game with fast moving subjects.

    That’s why there’s another method of focusing called AI-Servo (AF-C on Nikon). This method blew me away the first time I discovered it. Servo focusing actually tracks focusing on moving subjects. So if you’re at the park with your dog playing fetch and your dog is running full sprint to bring the ball back to you, you can place a single focus point of him in Servo mode and fire off as many shots as your camera can take before the buffer runs out. Assuming that you have a fast enough shutter speed, you should have a very high percentage of sharp, in focus images.

    So the thing I started to notice about having the camera in Servo mode is that I could use Servo just like One-Shot. You see, to use Servo focusing with BBF you have to constinuously hold down the AF-ON button to track focus. So if you have a still subject you can simply tap the AF-ON button and focus will stop adjusting when you let go of the button. I’ve found that if you have a still subject and hold down the AF-ON button in Servo mode, the camera will keep trying to work to find focus. So the subject will start going slightly in and out of focus because the camera thinks it should be looking for a moving subject. But again, if you simply tap the AF-ON button and let go when you see that your subject is in focus, you are good to go. When you practise this and it becomes second nature, it’s a very fast process that really takes no brain power or time at all.


  • Picasaweb : Télécharger un album

    Picasaweb a un avantage sur Flickr : La facilité de télécharger un album de Picasaweb vers un PC ou un Mac grâce au logiciel gratuit Picasa.

    Pour récupérer l’album sur le PC/MAC il faut ouvrir l’album sur Picasaweb et cliquer sur « Actions > Télécharger vers Picasa ».

    [box type= »info »] Il est possible qu’au lieu d’ouvrir Picasaweb le lien ouvre la nouvelle version Google+. Si c’est le cas ouvrez le lien https://picasaweb.google.com/lh/myphotos?noredirect=1 et puis essayer à nouveau le lien vers l’album photo. Un cookie sera sauvé dans votre navigateur internet et la prochaine fois vous devriez aller directement sur Picasaweb. [/box]

    Picasa va s’ouvrir automatiquement et va vous demander au bout de quelques secondes si vous voulez télécharger l’album sur votre PC/MAC.

    Cliquer sur « Download / Télécharger » et après un certain temps dépendant de la taille de l’album les photos seront disponibles sur VOTRE Picasa en local.


    [box type= »info »] Voyez l’article « Partage Photos via Picasaweb » pour créer un lien vers un de vos albums Picasa. [/box]

  • Marrakech – Jardins de Majorelle – Yellow Eggs

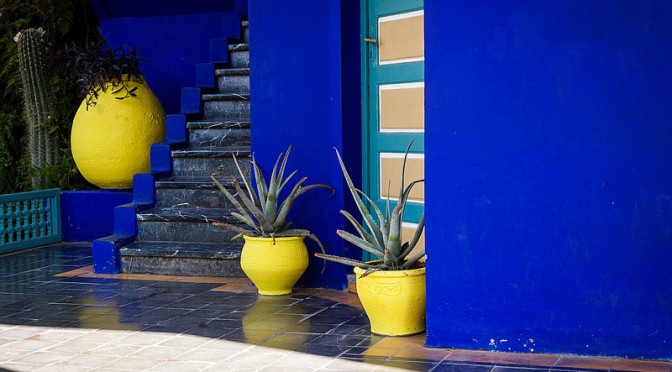
    Marrakech – Jardins de Majorelle – Yellow Eggs

    Je viens d’être invité à partager cette photo dans un groupe « The yellow eggs of Marrakech ».

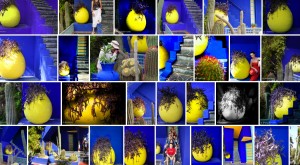
    Amusant de constater la différence de vue et rendu sur un même sujet !
    Point essentiel de divergence : Le rendu des couleurs.


    Voir les photos : http://www.flickr.com/groups/yellowegg/

  • Artsenal « Away »

    Artsenal « Away »

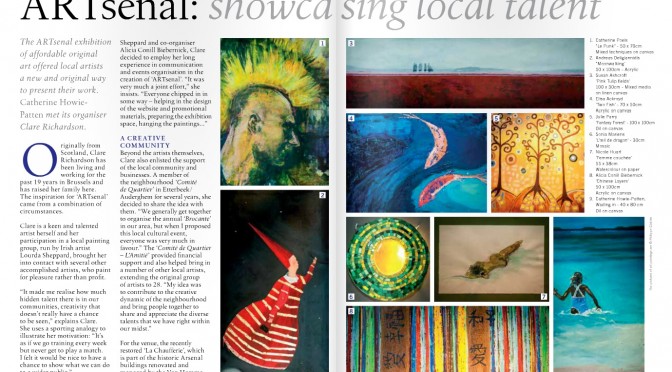
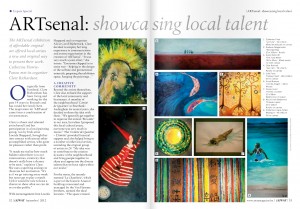
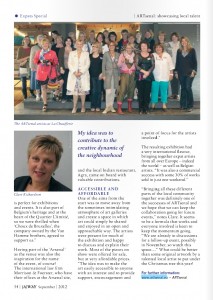
    J’ai pris les photos pour composer le catalogue de l’exposition Artsenal et un article, illustré par ces photos, a été publié dans l’édition de septembre 2012 de la revue « Away« .

    Mes photos illustrent les pages 52 et 53.

  • Objectif Rixensart

    Objectif Rixensart

    Objectif Rixensart

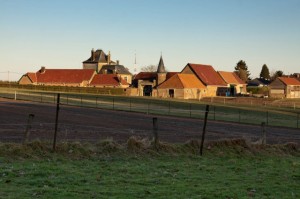
    3 photos sont reprises sur le blog « Objectif Rixensart« .


  • Big Noise : J.Dupont

    Big Noise : J.Dupont

    Cette photo,prise lors du concert de Big Noise au theatre Marni, a été utilisée par le pianiste Johan Dupont pour illustrer l’article le concernant dans le no 50 du magazine “Accroches” publié par le Conseil de la Musique.

    Lire l’article … 

    PC-20111103-Full JPG_MG_5585.jpg

    Johan Dupont l’utilise également sur son profile Facebook.

  • Diffraction

    Diffraction

    Lorsque l’on ferme le diaphragme (F plus grand) on améliore la profondeur de champ et la netteté.

    Mais à partir de F18/F20, la netteté se met à diminuer à cause d’un phénomène appelé « diffraction ».

    En savoir plus …


  • Exposition

    Exposition

    L’exposition, la quantité de lumière qui sera enregistrée, est conditionnée par :

    • L’ouverture du diaphragme

    • La vitesse d’obturation

    • La sensibilité

    Chaque modification d’un des ces paramètres modifie l’exposition.

    Le moyen le plus simple d’être certain que l’exposition est correcte lors de la prise de vue est d’utiliser l’histogramme.

    Ouverture (Diaphragme)

    Le diaphragme définit la taille de l’ouverture de l’objectif et donc la quantité de lumière pénétrant sur le capteur.

    Une grande ouverture signifie que le diaphragme est fortement ouvert et donc qu’une grande quantité de lumière pénètre sur le capteur.

    Au plus le F est petit au plus le diaphragme est ouvert (grande ouverture).

    Une petite ouverture signifie que le diaphragme est fortement fermé et donc qu’une petite quantité de lumière pénètre sur le capteur.

    Au plus le F est grand au plus le diaphragme est fermé (petite ouverture).

    Les échelles de diaphragme sont normalisées et chaque échelon donne une variation de 2x par rapport à l’échelon précédent.

    Une ouverture f /1,4 correspond donc à une grande ouverture, f /16 à une petite ouverture qui laisse entrer peu de lumière.
    D’un cran de diaphragme au suivant, on divise ou multiplie par deux la quantité de lumière reçue.
    En passant de f /8 à f /11, on divise par deux la quantité de lumière reçue.
    En passant de f /11 à f /8, on laisse passer deux fois plus de lumière.

    Vitesse (Obturateur)

    Les échelles de vitesse sont normalisées et chaque échelon donne une variation de 2x par rapport à l’échelon précédent.

    Cette même proportion se retrouve pour l’échelle des diaphragmes. Cela signifie qu’augmenter la vitesse (moins de lumière) d’un échelon et en même temps ouvrir le diaphragme (plus de lumière) d’un échelon revient à obtenir la même exposition.

    C’est ce qui se passe lorsque vous jouez avec la molette en mode P (Programme).

    Sensibilité (ISO)

    La sensibilité ISO est l’échelle de mesure de la sensibilité des surfaces sensibles (pellicule en photographie argentique, capteur en photographie numérique).

    Plus la valeur est petite, moins sensible est le capteur à la lumière.
    Plus la valeur est grande, plus le capteur est sensible à la lumière.

    Le prix à payer pour une sensibilité élevée (grande valeur) est l’apparition du bruit.

    Pour aller plus loin …

    http://photo.tutsplus.com/tutorials/photography-fundamentals/the-ultimate-beginners-introduction-to-exposure/

    http://objectif-photographe.fr/technique-photo-exposer-droite/


  • Profondeur de champ

    Profondeur de champ

    La profondeur de champ est la partie de l’image entre avant-plan et arrière-plan qui est nette.

    La profondeur de champ est conditionnée par :

    • L’ouverture du diaphragme
    • La longueur focale de l’objectif
    • La distance entre le sujet et l’objectif

    Au plus le diaphragme est ouvert au plus faible est la profondeur de champ.
    Au plus la longueur focale est grande au plus faible est la profondeur de champ.
    Au plus la distance entre l’objectif et le sujet est courte au plus faible est la profondeur de champ.

    Une faible profondeur de champ oblige de faire très attention à la partie de la photo sur laquelle on fait le point (focus) mais permet de détacher le sujet (visage) du fond (végétation, immeuble, …).

    En cas de faible profondeur de champ il est nécessaire de forcer l’autofocus à fonctionner sur un seul point et de positionner celui-ci sur le point d’attention essentiel du sujet (ex : l’oeil le plus proche de l’appareil pour un portrait).

    Hyperfocale

    L’hyperfocale est la « distance minimum à partir de laquelle le sujet est net, si on fait la mise au point sur l’infini. ».
    L’utilisation de l’hyperfocale permet de créer des images dans lesquelles tous les plans sont nettes.

    MP #77 : Comprendre et maîtriser l’hyperfocale

    Simulateur et calculateur de profondeur de champ

    Ce simulateur vous permet de jouer avec les différents paramètres influençant la PDC et de visualiser le résultat.

    Bokeh simulator & depth of field calculator 2015-09-02 20-16-34

    Photobuddy est une app pour smartphone permettant de calculer de nombreux paramètres photos, dont la PDC.