Ouvrir l’album
Cliquer sur le lien reçu pour ouvrir l’album dans Google+ Photos. Les photos sont accessibles à toute personne possédant le lien.
Exemple d’album : https://plus.google.com/photos/106263340664083946020/albums/5900401828380317617?banner=pwa&authkey=CK7ZssDRiJyHew
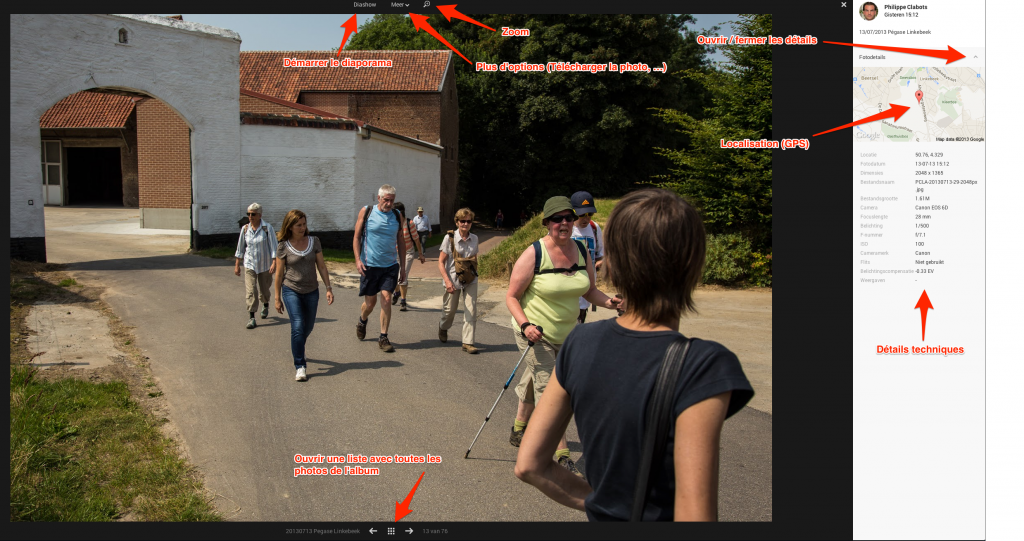
Démarrer le diaporama (Slideshow)
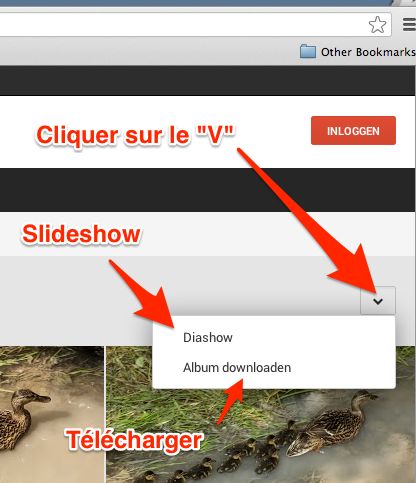
Cliquer sur le « V » en haut à droite de l’écran et puis sur « Diaporama / Slideshow ».
Télécharger l’album complet sur votre PC/MAC
Il est nécessaire d’avoir un compte (gratuit) Google pour pouvoir télécharger un album et d’avoir activé Google+ pour ce compte.
Si vous utilisez Gmail vous avez déjà un compte Google et il vous suffit d’utiliser vos identifiants Gmail pour vous connecter !
Créer un compte Google : https://accounts.google.com/signup
Activer Google+ : https://plus.google.com/
Il suffit de cliquer sur le « V » en haut à droite de l’écran et puis sur « Télécharger / Download » pour copier toutes les photos sous la forme d’un fichier compressé (.ZIP) sur son PC ou Mac.
Le fichier devra être décompressé une fois téléchargé en cliquant deux fois dessus ou en faisant un click droit et en choisissant « Décompresser » pour pouvoir accéder aux photos de l’album.
Ouvrir une photo
Il suffit de cliquer sur une photo pour ouvrir celle-ci.
Le « V » permet d’afficher une liste d’actions (par exemple : Télécharger la photo sur votre disque dur).